You guys! You guys! I can cross something off my summer list! I made popsicles over the weekend and oh my goodness they were delicious! And so easy too! Since it’s still pretty hot and you know you want to enjoy the last bit of summer, I’d highly recommend making these yummies! They’re healthy too..promise!
Strawberry Coconut Popsicles makes 10
INGREDIENTS
1 15-ounce can full-fat coconut milk
1 tsp vanilla extract
1 cup fresh strawberry puree
1/4 cup honey
DIRECTIONS
Whisky the coconut milk, vanilla and 2 Tbsp honey until smooth and creamy. Set aside.
In a separate mixing bowl, stir together the strawberry puree and the remaining honey, until combined. Add more honey to taste, if necessary.
For a layered popsicle, pour the coconut milk into the popsicle mold, divided evenly between the 10. Place in the freezer for 10 minutes, and then add the strawberry puree. Freeze for 30 minutes, then insert the popsicle sticks and continue freezing for 6 hours, until firm.
To remove the popsicles, either let them sit out for 5 minutes until soft to pull out, or submerge the bottom of the mold in room temperature water for 10-15 seconds then gently pull to release from the molds.
Notes
*If you’re like to have a mixed pop: stir together the coconut milk and strawberry puree and divide evenly between the molds. Freeze for 30 minutes, then insert the popsicle sticks and continue freezing for 6 hours, or until firm.
* Agave nectar would be great in here too but I loved the idea of the honey with coconut. Use whatever you like though! Remember the sweetness mellows out a little bit after the pops are frozen.
——
Have you made any popsicles or ice cream over the summer? Would love to know about any favorites you have. We ate these ones so fast I want to make some more. It’s nice to have cold treats handy!
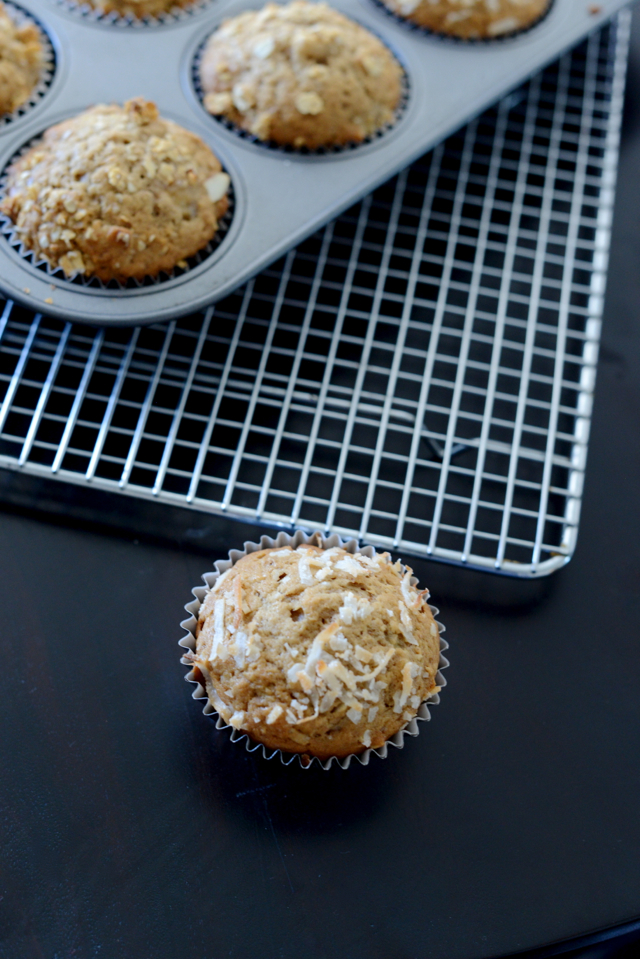
Fall is my favorite time for baking and I feel like I have a recipe To Do list that’s a mile long. Seriously, I want to make way too much food right now haha! Muffins are a favorite though because it’s a great grab and go breakfast. I thought these BANANA AND COCONUT MUFFINS would be perfect. and they’re healthy too! Well, as healthy as muffins can get. I topped half the muffins with shredded coconut for Matthew since it’s his fave, and I put granola on top of the other half for me. It worked out and it ensured there wasn’t any muffin stealing going on! Sometimes we get quite protective over our sweets!
Banana & Coconut Muffins makes 12 muffins
INGREDIENTS
1.5 cups all purpose flour
1/2 cup brown sugar
1/4 cup white sugar
1 teaspoon baking powder
1/2 teaspoon baking soda
1/4 teaspoon salt
1 teaspoon cinnamon
1 stick (1/4 pound) unsalted butter, melted and cooled
1 extra large egg
1/4 cup whole milk
1 teaspoon vanilla extract
1 ripe medium-sized banana, mashed
1 ripe medium-sized banana, diced
1/2 cup small diced walnuts
1/3 cup sweetened shredded coconut
shredded coconut or granola for topping
DIRECTIONS
Preheat over to 350 degrees.
Cook for 20-24 minutes, rotating halfway through. Enjoy!
—-
These muffins were so yummy and I couldn’t resist eating them as a midday snack too!
This recipe has been on my “must make” list ever since I read the description. They compare it to a Samoas girl scout cookie, but in bar form. Samoas are my absolutely favorite Girl Scout cookies so I obviously had to make them! Plus, Matthew is obsessed with coconut! These came out way better than I could have imagined. They’re sweet and rich, but soo good! Matthew and I have been joking that they look just like granola bars, but they’re not what you would call “healthy.” But hey, you have to live a little and satisfy that sweet tooth! They’re definitely worth it!
For the Toasted Coconut:
3 cups shredded sweetened coconut, divided
For the Cookie Base:
2 cups all-purpose flour
½ teaspoon salt
8 ounces (2 sticks) unsalted butter, softened, cut into ½ inch cubes
½ cup granulated sugar
½ teaspoon pure vanilla extract
For the Caramel Layer:
1 cup light corn syrup
½ cup granulated sugar
½ cup firmly packed light brown sugar
1 cup heavy cream
½ cup sweetened condensed milk
2 ounces (1/2 stick) unsalted butter, at room temperature, cut into ½ inch cubes
1 teaspoon pure vanilla extract
For the Assembly:
6 ounces good quality dark chocolate (60-72%), coarsely chopped
2 ounces good quality milk chocolate, coarsely chopped
DIRECTIONS
Toast the coconut: Preheat the oven to 300 degrees F. Line a baking sheet with parchment paper. Spread the coconut in an even layer on the baking sheet and toast, tossing and turning every 4 minutes or so, until the coconut just starts to turn golden, about 12 minutes total. Remove the coconut from the oven and set aside to cool.
Make the Cookie Base: Increase the oven temperature to 350 degrees F. Lightly spray a 9-by-13-inch baking pan with nonstick cooking spray and line it with parchment paper, allowing the parchment to overhang on two sides. Lightly spray the parchment paper.
In a medium bowl, whisk together the flour and salt. In the bowl of a standing mixer fitted with the paddle attachment, beat the butter and sugar on medium speed until fluffy, approximately 2 minutes. Add the vanilla and the flour mixture and beat just until combined. Turn the dough out into the prepared baking pan and, with lightly floured hands, press the dough into an even layer on the bottom of the pan (do not press up the sides). Prick the top of the dough with the tines of a fork and bake the crust for 25 to 30 minutes, rotating the pan halfway through the baking time, until golden. Remove the pan from the oven and place on a wire rack to cool.
Make the Caramel Layer: In a medium saucepan, combine the corn syrup, both sugars, and 2 tablespoons of water and stir gently so you don’t splash any of it up on the sides of the pan. Set the saucepan over low heat and continue to stir gently until the sugar dissolves. Clip a candy thermometer to the side of the pan, making sure the bulb of the thermometer is immersed in the syrup. Turn the heat up to medium-high and wait without stirring for the mixture to reach 240 to 245 degrees F, about 7 minutes. Keep a watchful eye on the temperature while you proceed with the next step—you do not want the mixture to exceed 250 degrees F.
Meanwhile, in a small saucepan over medium heat, stir together the cream and sweetened condensed milk. Gently warm the mixture; do not let it boil.
Once the sugar mixture turns amber, remove it from the heat and stir in the butter and the warm cream mixture until completely combined (be careful as it will bubble up when you add the cream mixture). Place the pan back over medium heat, stop stirring, and bring the mixture back to 245 to 250 degrees F. Remove the pan from the heat, stir in the vanilla, and fold in 2 cups of the toasted coconut. Pour the caramel directly onto the cookie base and, working quickly, spread it into an even layer with an offset spatula. Sprinkle the remaining 1 cup of toasted coconut over the caramel. Let cool to room temperature, about 2 hours, then place in the refrigerator to chill for at least 1 hour.
Line a baking sheet with parchment paper. Use a knife to loosen the chilled bars from the sides of the pan, then lift the bars out using the parchment paper overhang. Spray a sharp knife with nonstick cooking spray and cut the bars into twenty-four 3-by-1 1/2-inch rectangles and place on the prepared baking sheet. Refrigerate until ready to assemble.
Assemble the bars: Melt both chocolates together in the bowl of a double boiler over medium heat or in the microwave (in a microwave-safe bowl, cook the chocolate at 50% power (medium) for 15-seconds bursts, stirring between each blast, until melted). Dip half of each individual bar in the melted chocolate, scrape off the excess chocolate with an offset spatula, and place the bar back on the baking sheet. Repeat with the remaining bars. Alternatively, dip the bottom of each bar in the remaining melted chocolate, scrape off the excess chocolate with an offset spatula. Return to the baking sheet to set. Once set, squeeze the chocolate into one corner of the zippered plastic bag and twist the other end of the bag a few times to form a makeshift pastry bag. Use a kitchen scissor to snip off the small corner of the bag where the chocolate has collected (you don’t want too large a snip or the chocolate will ooze out). Working quickly, drizzle the chocolate in a zigzag pattern across all of the bars. Place the pan of bars back into the refrigerator for 15 minutes to let the chocolate set up. Serve immediately. The bars can be stored in the refrigerator, tightly covered, for up to 4 days. They taste really good directly from the refrigerator as well as at room temperature—it’s up to you.
——-
What’s your favorite Girl Scout cookie? Have you ever made any copycat recipes for them?
I desperately need to find one for Tagalongs, my second favorite!
Welcome to M Loves M! My name is Mara and I created this lifestyle site in 2009 as a place to share my love of fashion, beauty, food and entertaining. I moved from Southern California to Idaho and love adventuring with my husband Matthew, our two children, and our dog Ginger. We're also pregnant with baby #3, due this autumn! I strive to create a site that’s relatable to women, while also being inspirational. I’m so glad you stopped by!